
Problem: You have only the names of the characters in your project, not full-fledged characters.
If you followed yesterday's walkthrough, you already have a running scene. Alex says "I was waiting for you." Jordan says "I wasn't sure I'd come." It plays. It works.
But open the project and look at the composition. What does the engine actually know about Alex? That it exists, and that it has a replica. And everything. There is no face on the screen, no sense of who he is, no reason why the player should care if the secret comes out.
In many ways, the success of a visual novel is determined by its characters. The AI quickly brings you to the first playable prototype - that's the point - but the line-up it has defined is the starting point, not the ending and today we'll fix that.
Why customization is the difference between "tech demo" and "story"
Think about the last visual novel that stuck with you. You probably remember a face, a voice, the moment of hesitation when choosing. None of that comes from the dialogue alone — it comes from the character behind the dialogue.
If you give a character a bio-mask, an appearance and a set of expressions, you get:
- The writing gets sharper. As soon as you determine that Jordan is restrained and tired, you begin to feel the hero and write his lines.
- The scene reads as a scene. A sprite that shifts from "calm" to "tense" tells the player more than a paragraph of description.
- Your export gets richer. Every engine ScriptFormer targets — Ren'Py, Ink, Yarn Spinner, Dialogic, HTML5 — can use character metadata and sprite variations to drive who's on screen and how they look.
Character customization is how the script becomes your story.
Step 1 — Open the Characters workspace
Inside your project, ScriptFormer keeps everything in dedicated workspaces. Chapter Characters (it sits alongside Scripts, Locations, and Types in the project navigation).
Open it and you'll see the characters the converter pulled out of your script — in our running example, ALEX and JORDAN. The converter already created a clean character asset for each one. Now we make them real.
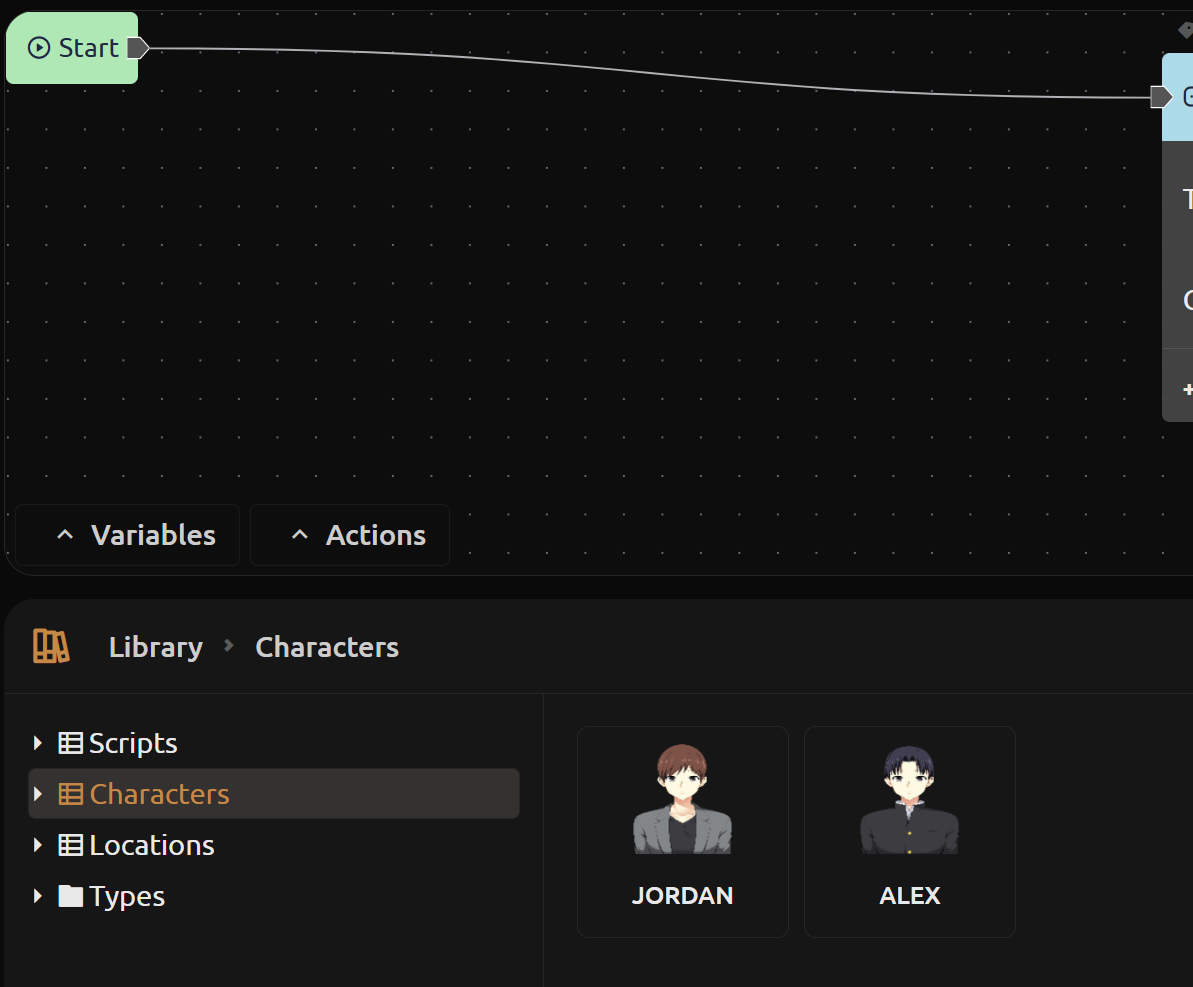
Every character (and every location) is built from the same set of building blocks: a Name, a Description, a Properties table, and a Variations (or, for locations, background) image set. Let's walk through each.
Step 2 — Refine the name, bio, and properties
Click a character to open its editor. Three fields matter most right away:
- Name — the converter identified from how lines were tagged (
ALEX:in your script). If it got it wrong, or you want a fuller name ("Alex Rivera" instead of "ALEX"), rename it here. This name is what shows in the exported dialogue, so get it right once and every export inherits it. - Description / bio — this is the heart of the character. Write a few sentences: who they are, what they want, what they're hiding. You don't have to share all of it with the player, but you should know. For Jordan in The Café, the bio might be: "A person with a patient and composed demeanor. They appear confident and expectant, possessing a calm voice and a steady gaze that suggests they were certain the other person would arrive."
- Properties — a simple name-value table attached to the asset. This is where you keep structured facts about the character:
age: 34,zodiac_sign: Pisces,temperament: hesitant. Unlike the free-form bio, properties are machine-readable — handy for tracking details, keeping your writing consistent, and feeding later team workflows. Add as many rows as you like; they're your private character sheet.
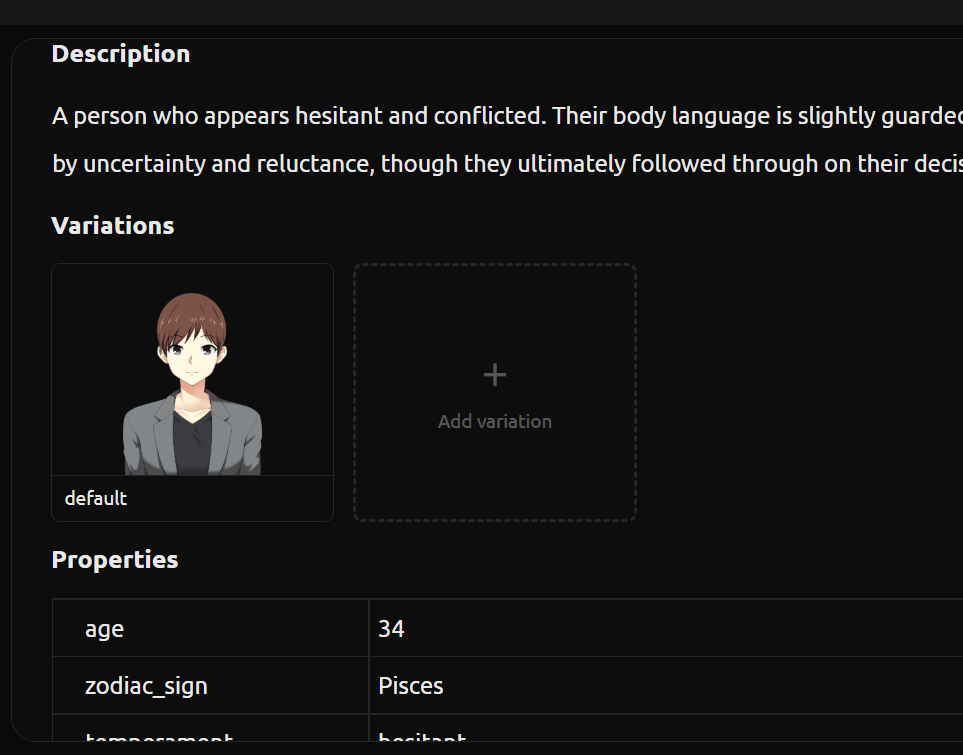
That name, that paragraph, and that little table already change how you'll write their next line.
Tip: the description is for you and your team. It travels with the project (and into cloud/team workflows later) but doesn't clutter the player-facing script.
Step 3 — Upload a sprite and its variations
Each character has a Variations section — this is where sprite art lives. A "variation" is just a different look for the same character: a pose, an expression, a mood. You might add:
default— the resting pose (the one shown when the character first speaks)smile— warm, relievedtense— guarded, jaw tightsad— the moment the secret lands
To add one, hit the add variation control in that section and drop in an image (.png or .jpg). Give it a clear name — you'll reference that name later when you tell the scene "show Jordan tense." The first image you add becomes the default automatically, which is exactly what you want for the opening of the scene.
You don't need a full rigged sprite sheet on day one. Even one decent default portrait makes the scene feel alive, and you can layer in smile / tense / sad as your art comes together. The structure is there; the polish is yours to add.
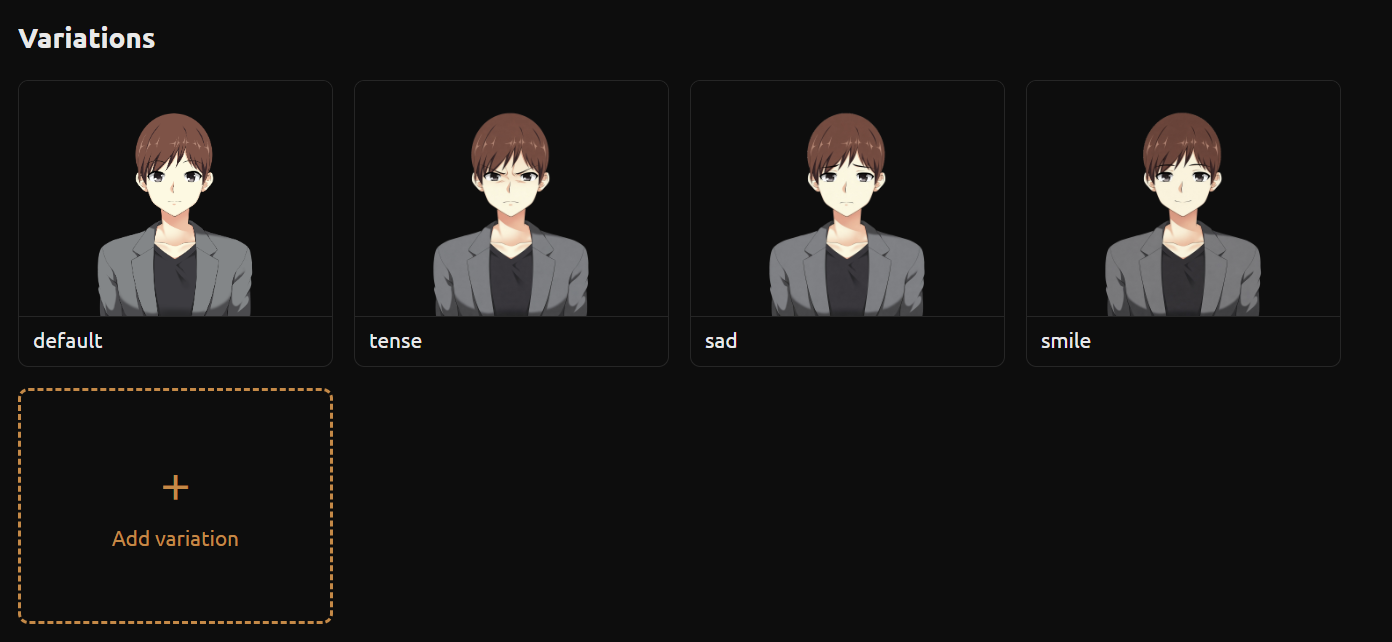
Where do I get the sprites from? Use your own custom art, custom work, an AI image generator, and a free asset pack. ScriptFormer gives you complete freedom of action.
Step 4 — Locations work exactly the same way
Characters aren't the only thing worth defining. Let's also create the place where Alex and Jordan meet — the near-empty The Café — in the Locations workspace.
Open Locations and you'll see The Café. Just like a character, it has:
- a name you can refine,
- a description (warm light, two chairs pulled close, the owner wiping down the last table),
- a properties table — e.g.
time_of_day: 11:48,mood: quiet,neon_sign: flickering— so the place feels as concrete as the people in it, - and a place for a background image — the visual the player sees behind the dialogue.
Set a background for The Café and suddenly the scene isn't happening in a void. The sprites have a stage.
What you solved today
- Your cast went from bare names to characters with bios and faces.
- Alex and Jordan each have a
defaultsprite, with room forsmile/tense/sadas you grow the art. - The Café has a name, a description, and a background.
The scene you exported yesterday now has people in it.
What's next: shape the branching yourself
Right now the flow is whatever the AI identified. Tomorrow we open the scene graph and reorganize it — add a branch, rewrite a line, and tell the story where each character and location appears Try it now: open your project at scriptformer.com/app, jump to the Characters workspace, and give Alex and Jordan a face. Five minutes of customization is the difference between a demo and a story.
FAQ
Do I need art skills to add sprites? No. Upload any image — even a placeholder. The structure (named variations like default, tense) is what matters for the export; you can swap in polished art later without touching the script.
The converter named my character wrong. Can I fix it? Yes — rename the character asset directly. Because the name drives the exported dialogue tags, fixing it once corrects every scene that uses that character.
Can I have more than one sprite variation? Absolutely. Add as many as you like — poses, expressions, outfits. Name them clearly (smile, tense, sad) so you can reference them when the scene changes a character's look.
Does customizing characters affect all engine exports? Yes. The character metadata and sprite variations are part of the project, so Ren'Py, Ink, Yarn Spinner, Dialogic, and HTML5 all pick them up when you export.