
The opportunity: a solid first draft, and room to grow
In the last two posts you turned a pasted dialogue into a running scene and gave Alex and Jordan a face. By now the AI has read your script and laid it out for you — characters, dialogue, and the flow between them, all in order. That first pass is genuinely useful: it gets a playable scene in front of you in minutes.
We have laid a great foundation on which to refine our story. At this point, most tools will require knowledge of the code in order to build the logic manually. In ScriptFormer, a scene can be finalized directly in the visual editor - ** the script graph** of connected nodes, as if it were a sketch on paper.
Why the graph is the right place to refine
Because your history is stored as a structure, not as syntax, you have complete freedom of action without the risk of breaking anything. Every important moment is a node, the lines between the nodes show the movement of the plot. Do you want to make some selections for the player? Not a problem! Do you want to move the stage? Everything is in your hands!
In addition, the resulting structure can easily be converted into code, which can be transferred to any game engine of your choice.
Step 1 — Open the script graph
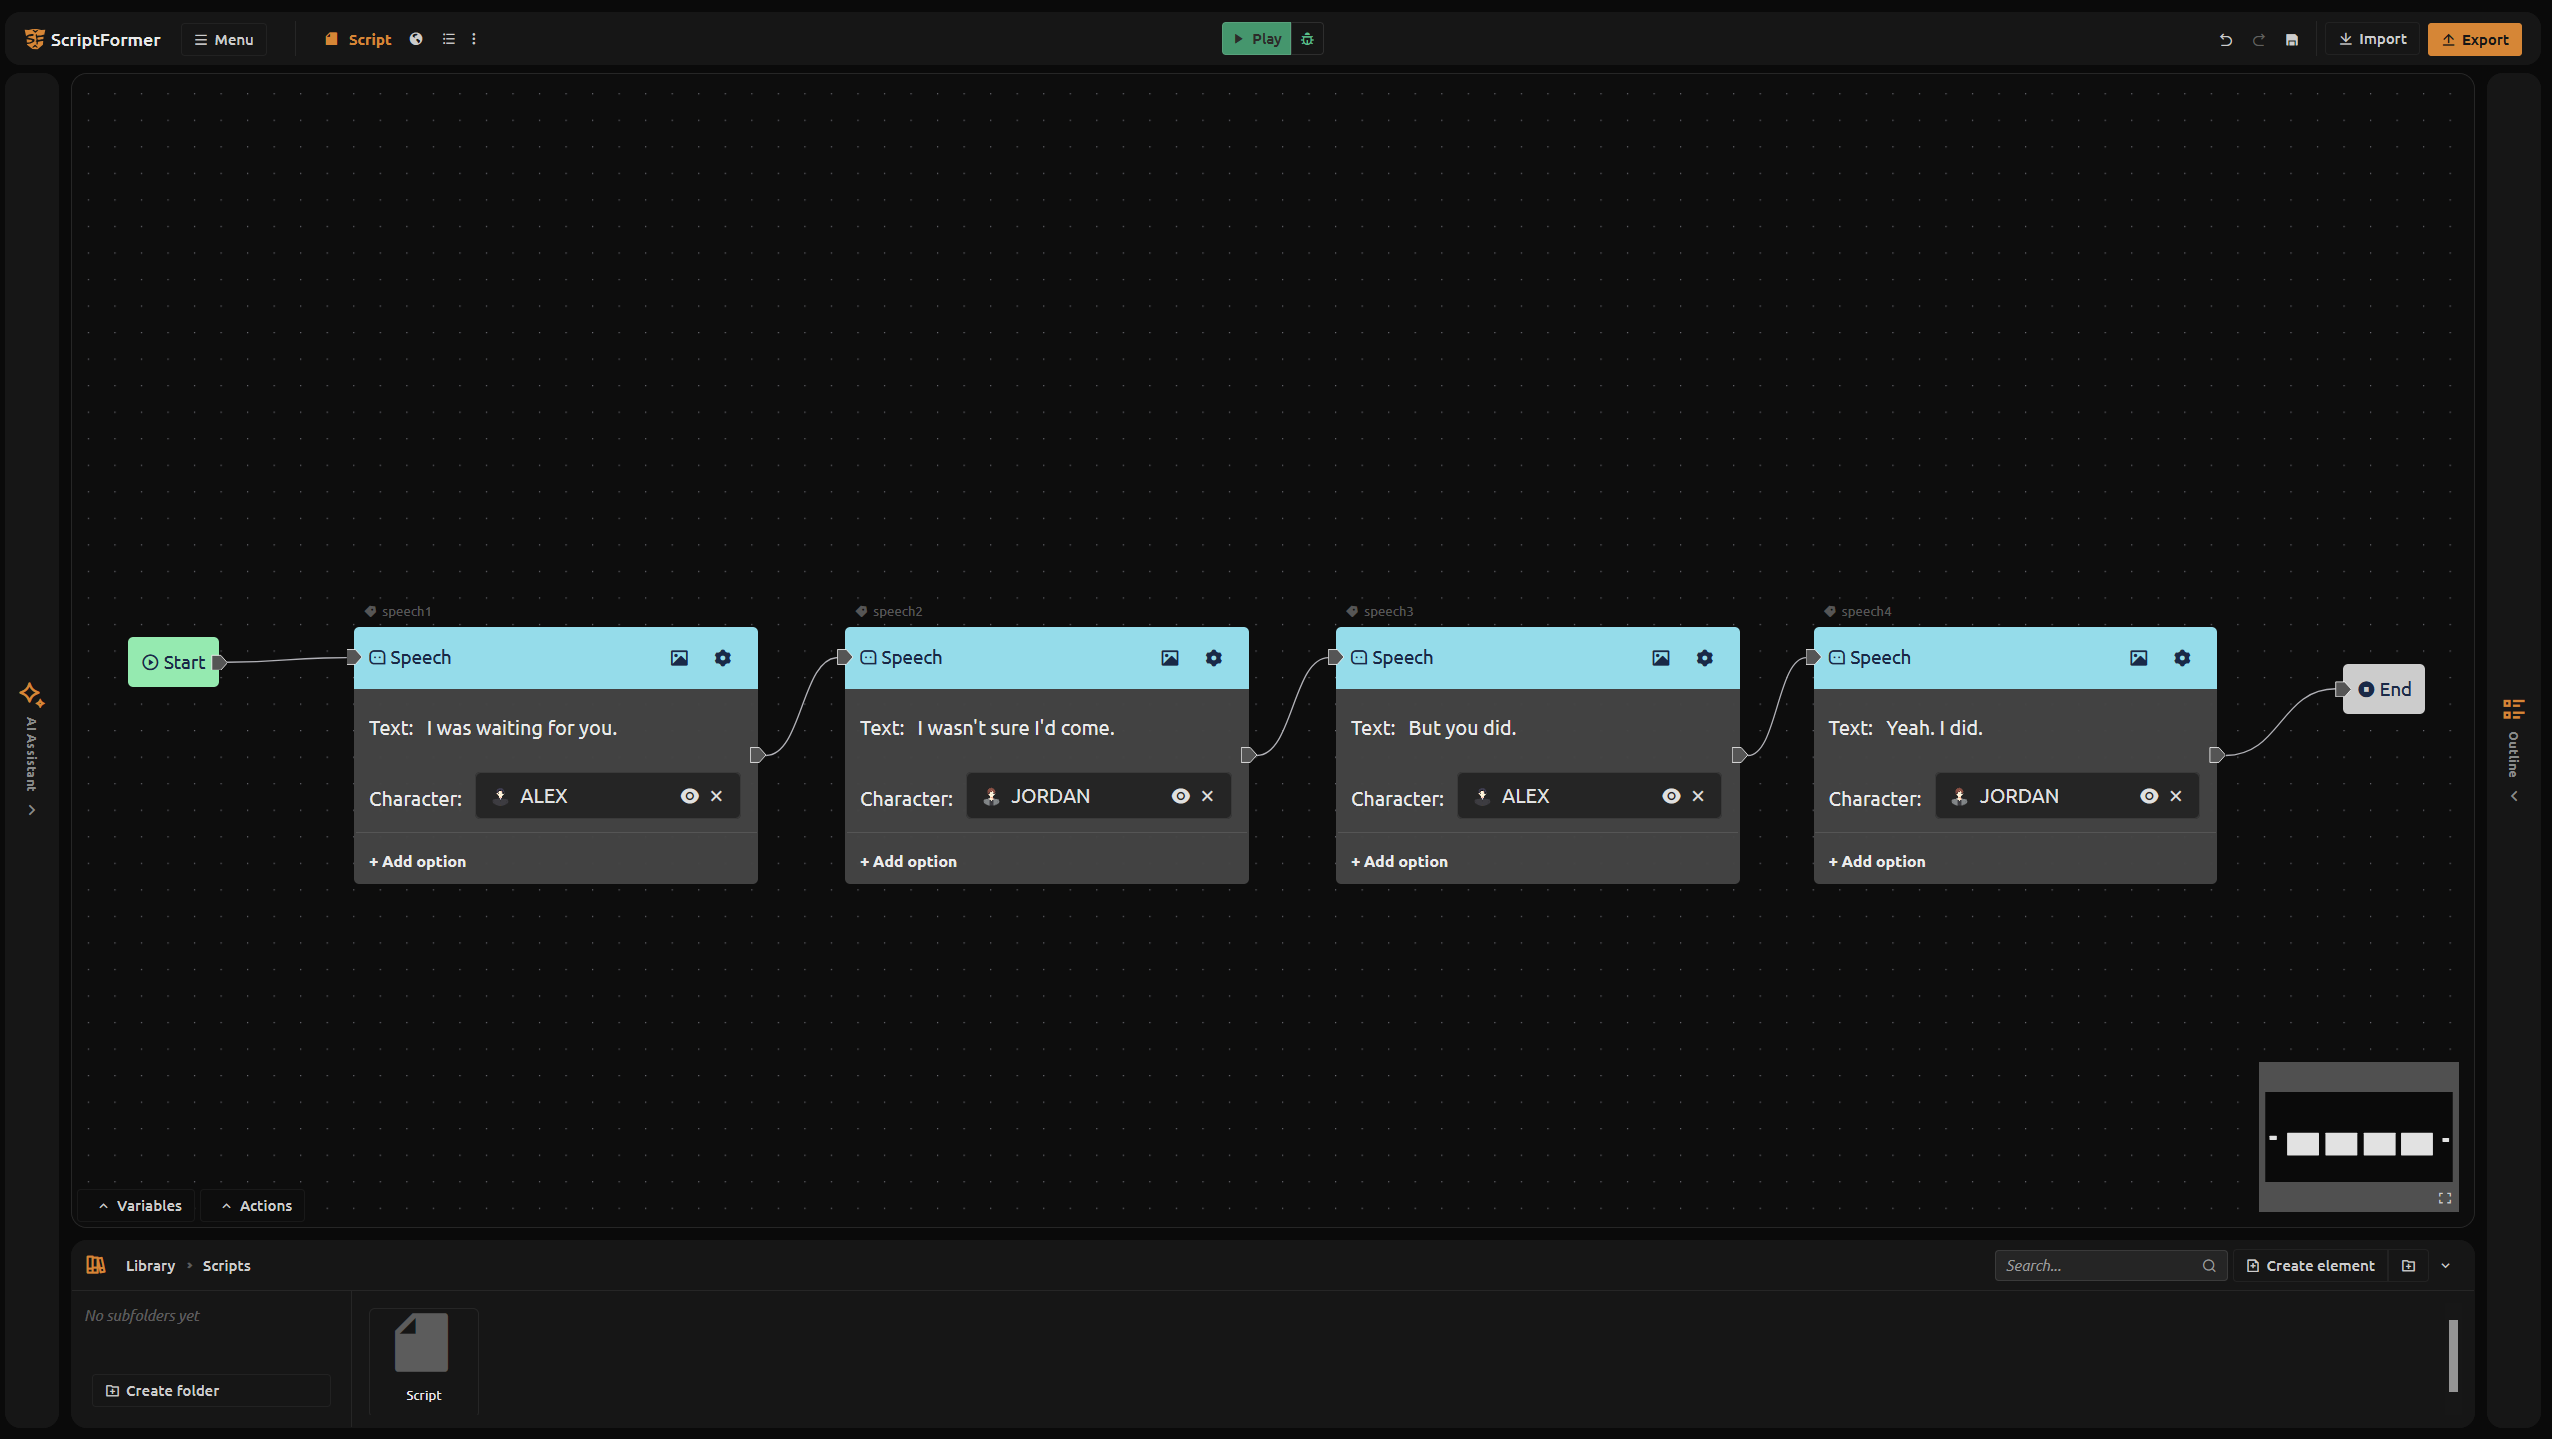
Open the script in the project, and its visual representation will open in front of you. This is the same scene you were working with, just drawn as connected nodes instead of the usual text.
You will see 3 types of base nodes:
- Start — where the scene begins.
- Speech — a line of dialogue, narration, or a small choice point. Most of the scene is these.
- End — where the scene finishes.
There are more node kinds available: right-click anywhere in the graph to open a context menu and see them all (we will analyze them in more detail as we improve the plot.).
Step 2 — Add emotion by giving a choice
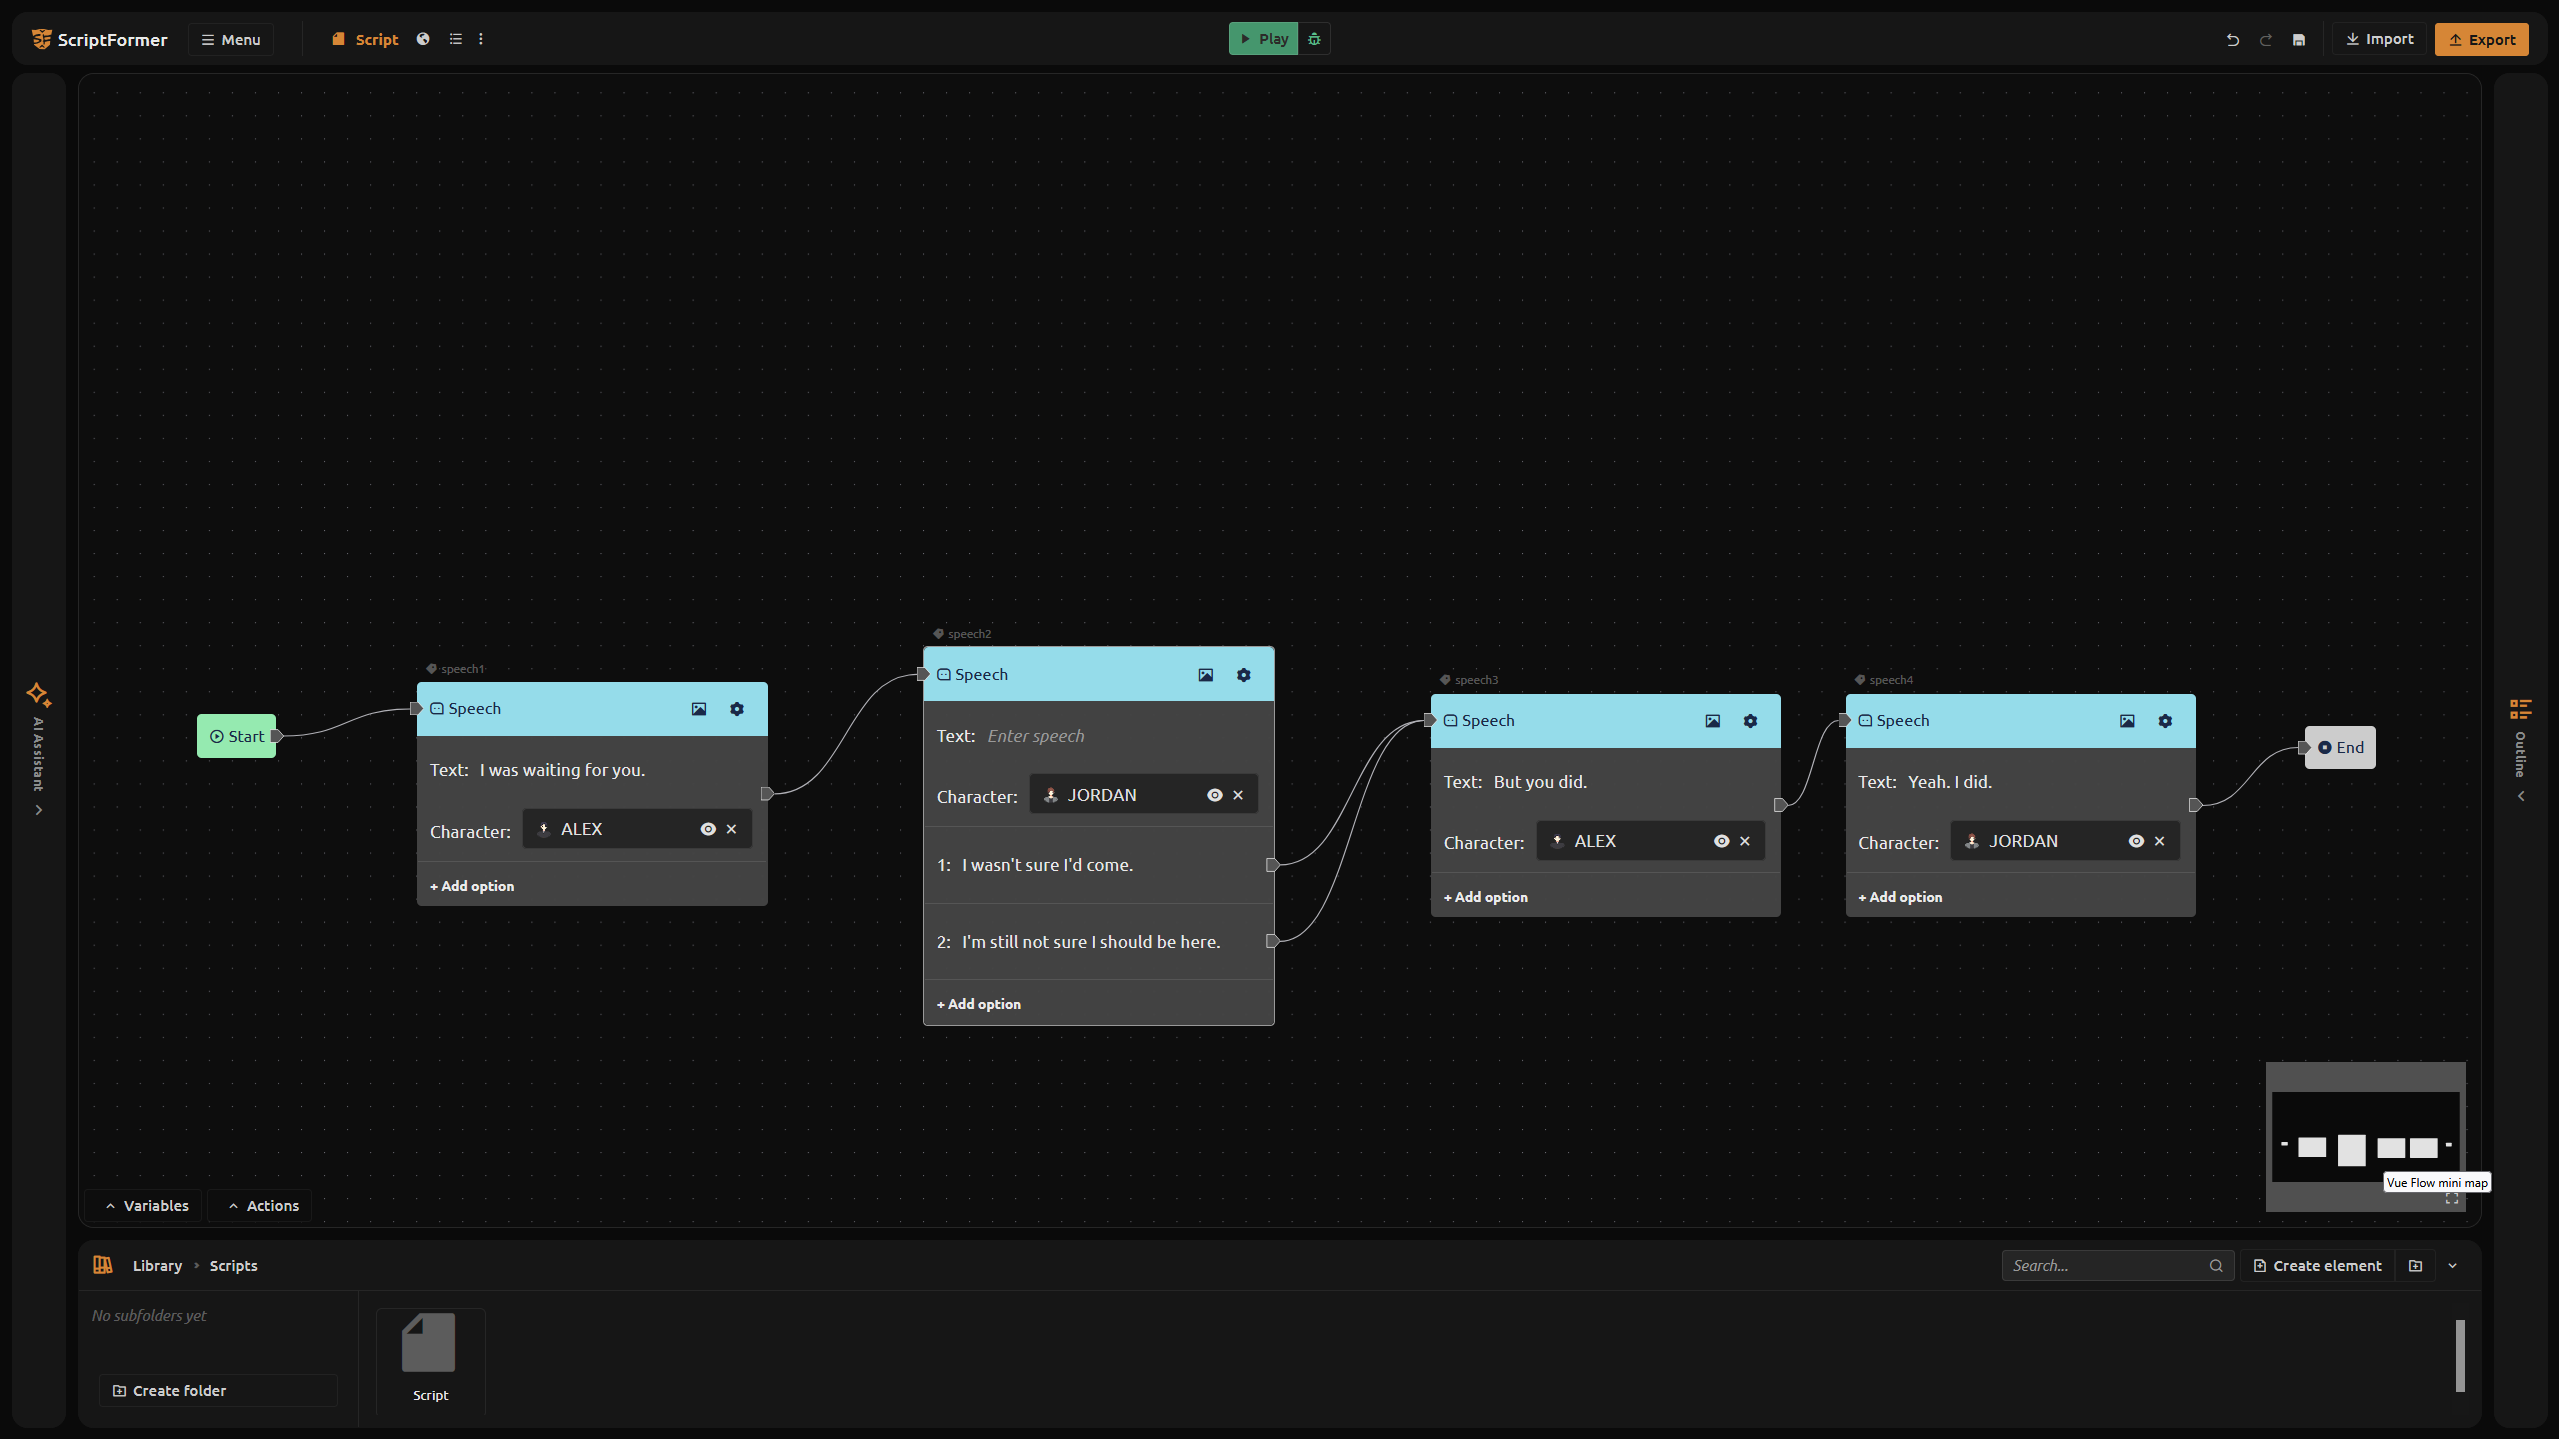
The fastest way to spice up a scene is to put the player in front of a difficult choice. To do this, click Add option on the replica node.
A natural spot in The Café: right after Alex says "I was waiting for you," let Jordan choose how to answer. Let's add the option "I wasn't sure I'd come." and the option "I'm still not sure I should be here." — The first makes Jordan relax and admit that he almost stayed at home, the second creates an atmosphere of distrust. Either way, that single beat now reads as two different moods.
So far, both options lead to the same node. The end (End) - and this is completely normal: you just determine the choice yourself. We will create a more complex branching for the plot forks later using a separate node Condition.
Step 3 — Rewrite a line right in the graph
Editing one line should not turn into rereading the entire plot. Click on the node that contains the replica and edit it on the spot. Clarify what Jordan is saying, shorten the sentence, and make Alex's answer sound different.
Since the nodes retain their meaning (who says what is said) rather than a block of formatted text, the edit remains clean. Change the wording of the replica node and the whole scene remains intact.
Step 4 — Set the scene and put characters on stage
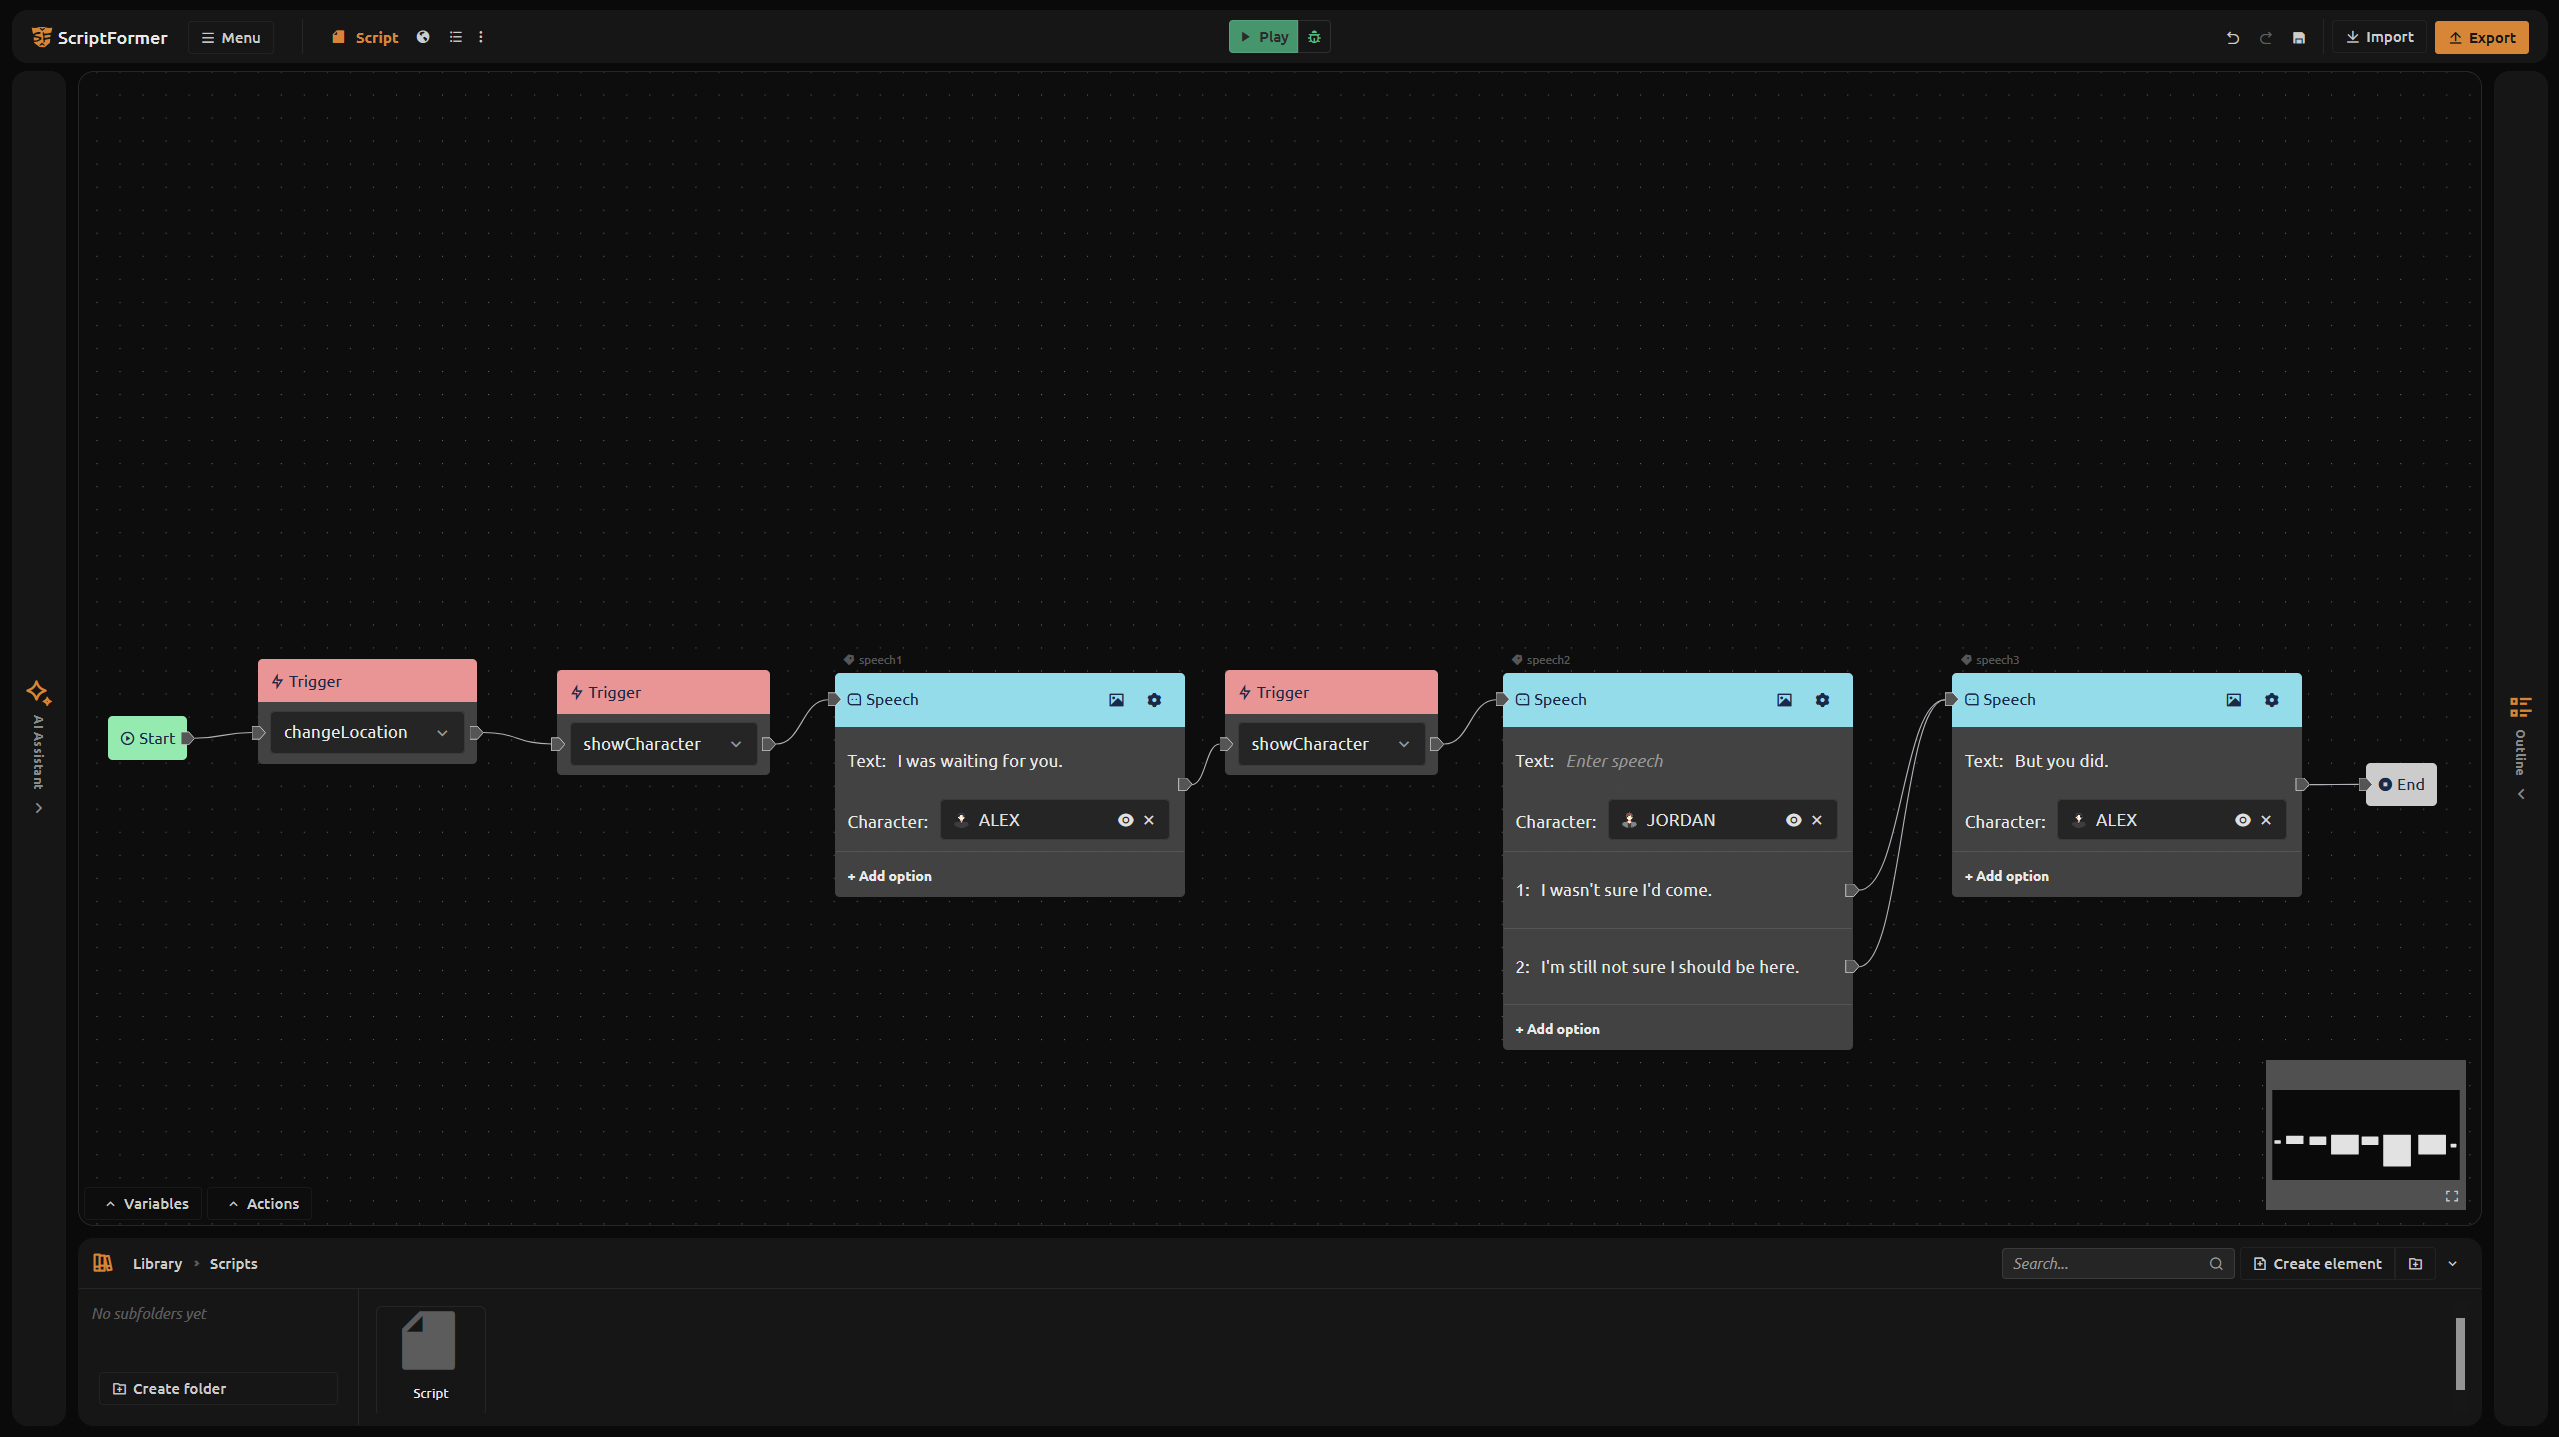
In addition to the words, the scene is enlivened by the surroundings. The graph allows you to assign everything directly. Towards the beginning, add the ChangeLocation trigger. This tells the engine to show the cafe background. So far, we only have one location, so we're not moving anywhere - for the first time, we're just displaying the location on the screen.
Then we'll make the characters appear. Add a showCharacter trigger for Alex and one for Jordan immediately after setting the location - so that the stage is filled with their sprites and the conversation has faces on the "stage".
It's still primitively flat on the story side — but visually, The Café now opens with a background and our two characters instead of bare dialogue. None of this is written as engine syntax; it's a visual action on a node, and the coding happens for you at export.
What you solved today
- You turned the AI's first draft into a real script graph you can read and shape.
- You deepened a moment by adding a real choice with two distinct replies.
- You rewrote a line in place, without hunting through text.
- You gave your characters a face on stage and set the scene in The Café with a changeLocation + showCharacter triggers.
Right now, the choice rolls both answers into one ending. Next, we will give each answer its own thread and add variables so that the election history has its own history.
What's next: make branches react to the player
Right now the choice rolls both answers into the same ending. Next we give each answer its own branch and add variables, so the story remembers what the player picked — and branches start to react.
Try it now: open The Café at scriptformer.com/app, open its script graph, and add one choice you actually want. Two minutes of reshaping is where your version of the story starts.
FAQ
What is a script graph? A visual representation of your story in the form of connected nodes: each remark, choice, or action is a node, and the lines show the course of the plot. Drag and reconnect nodes to rebuild the story.
Do I need code to change the branching? No. You add, edit, and reconnect nodes visually; engine code is only generated at export.
Can I edit a line without leaving the graph? Yes. Click on the replica node and edit its text on the spot - the other nodes do not lose touch.
How do I add a choice to a line? On a speech node, hit add option to create one. Give it an answer, and later, its own path.
How do I make a character or location appear? Dropping a changeLocation trigger shows a location, and showCharacter puts a character on stage.